How To Install Carpet Tiles With Carpet Tape Double Sided
Carpet tiles are a popular flooring option for both residential and commercial spaces. They are versatile, durable, and easy to install. Carpet tiles can be installed over concrete, wood, vinyl, hard tile, laminate and rubber with double sided carpet tape. Installing carpet tiles with carpet tape is a cost-effective and easy way to give your space a new look. In this article, we will guide you through the steps to install carpet tiles with carpet tape. There are two methods ("Grid Method" and "Corner Method") you can decide which will be best for your specific situation.
What You Need For Installing Carpet Tiles:
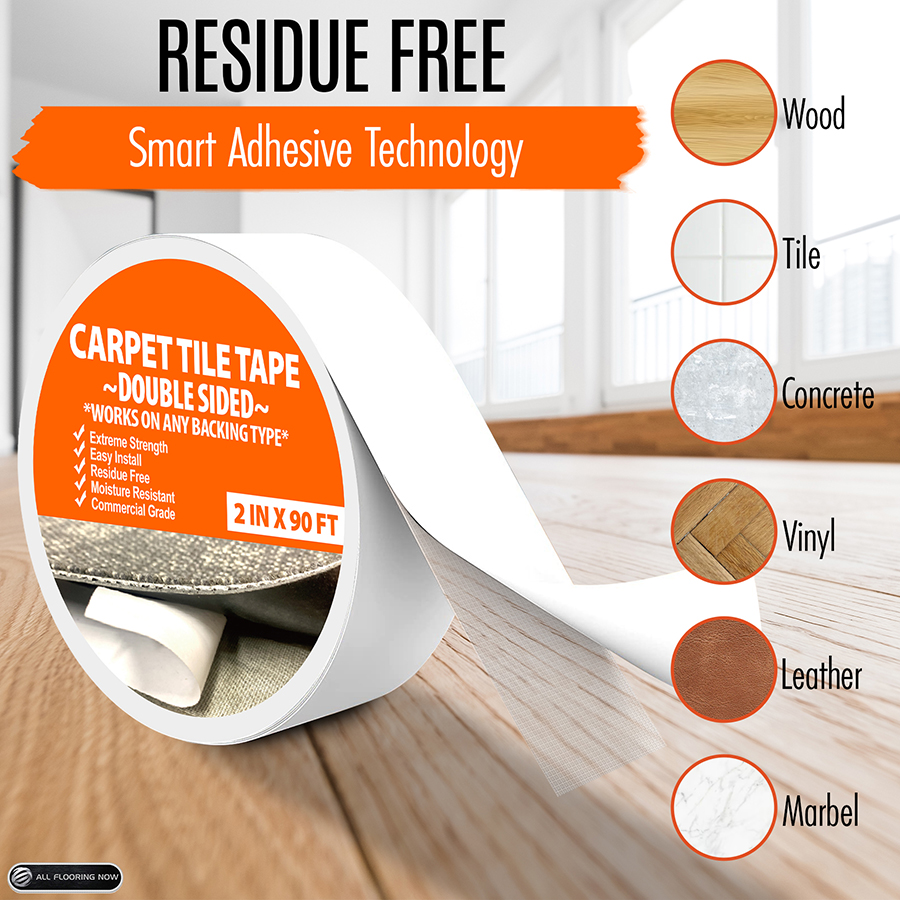
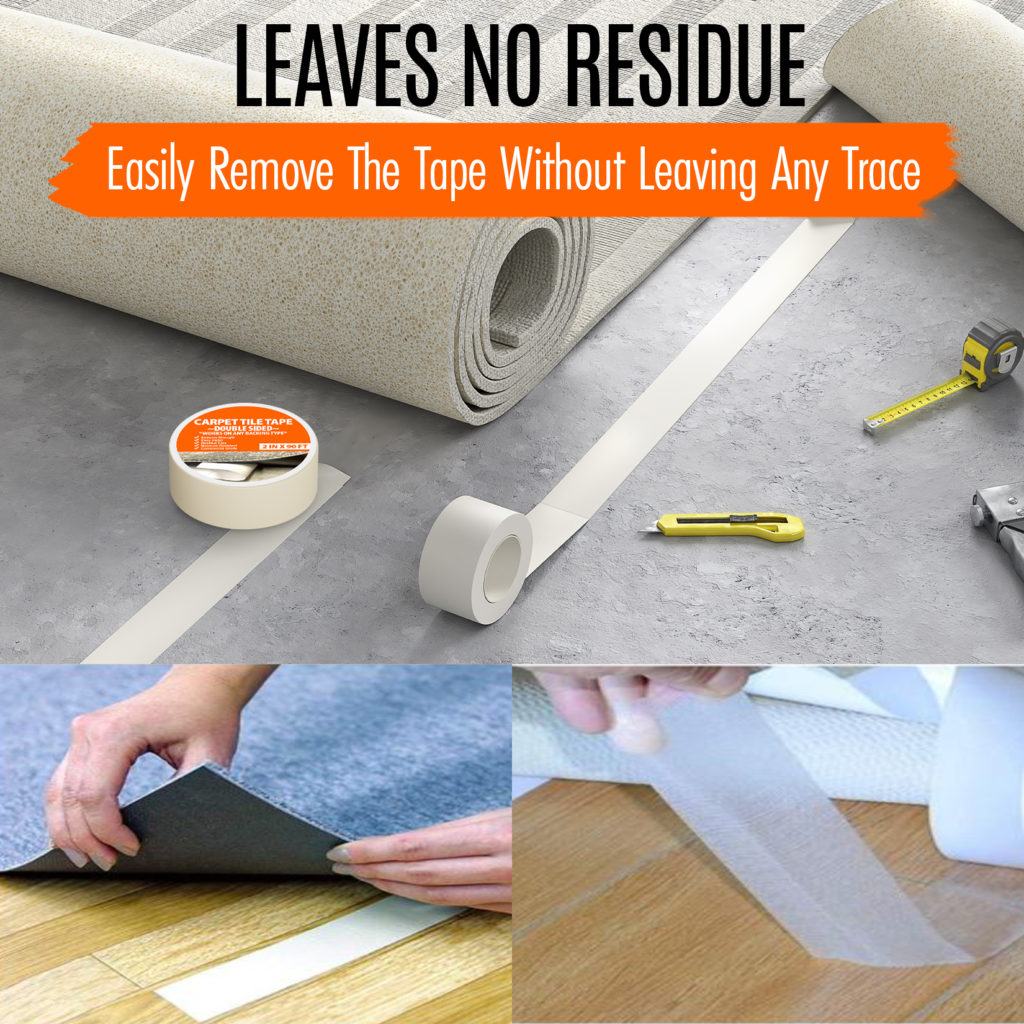
1. Carpet Tile Tape by All Flooring Now (Extreme strength, residue free, moisture resistant, indoor / outdoor use)

2. Utility Knife
3. Straight Edge or T-Square
4. Carpet Tiles
5. Tape Measure
6. Cardboard box or scrap piece of wood to cut carpet tiles and carpet tile tape on.
Step 1: Prepare the Subfloor
Before you begin installing carpet tiles, it is important to prepare the subfloor. The subfloor should be clean, dry, and free of any debris. Any cracks or holes in the subfloor should be filled in and leveled.
Step 2: Plan the Layout
Next, you will need to plan the layout of the carpet tiles. It is important to measure the dimensions of the room and determine how many tiles you will need. You can use a chalk line to mark the center of the room and create a grid pattern. This will help you align the tiles and ensure a uniform look.
Step 3: Apply the Carpet Tile Tape
Once you have planned the layout of the tiles, it is time to apply the carpet tape. Carpet tile tape is a double-sided adhesive tape that is used to hold the carpet squares in place. It is important to choose a high-quality carpet tape like All Flooring Now Carpet Tile Tape that is extreme strength, residue free, safe for all flooring surfaces and easy to use.
There are two different ways you can install carpet tiles which will be explained below. Read through both options and decide which method would best fit your needs.
Method 1: "GRID" Carpet Tile Installation Method
- Start by applying the tape along the perimeter of the room, about one inch away from the wall. Make sure the tape is evenly spaced and applied in straight lines around the boarder of the room (as shown in diagram below).
- Next, apply the tape centered across the middle of the room and then in diagonal strips from the center outward to the corners in one foot gaps (as shown in diagram below).
- Peel back the tape paper where you start and begin laying your tiles from the middle of the room outwards.

Method 2: "CORNER" Floating Carpet Tile Installation Method
1. Roll out Carpet Tile Tape with paper side down.
2. Use a utility knife to cut several 6 inch strips.
3. Layout your tiles completely in your space.
4. Each 6 inch strip goes under the corners of 4 touching tiles with adhesive side up.
5. Leave paper side on so the tiles "float" over the floor.
6. Peel up one carpet tile corner and place one 6 inch strip on a 4th of the tape.
7. Lift up second tile next to it and place that corner on adhesive side of tape and press both corners down to the floor.
8. Lift the last two tile corners up and press the tape down under the corners then press the corners down.
9. Leave paper side on and "float" tiles over the floor

Step 4: Finish the Installation
Once all of the tiles are installed, it is time to finish the installation. Use a heavy roller or walk on the floor to ensure the tape is secure to the tiles and floor. This will help to activate the adhesive on the carpet tape and create a strong bond.
Step 5: Enjoy Your New Carpet Tiles!
Once the carpet tiles are installed and secured in place, it is time to enjoy your new flooring! Carpet tiles are a great option for a variety of spaces, and with the use of carpet tile tape, they can be easily installed and removed without a hassle or mess if necessary.
Tips for a Successful Installation:
- Choose a high-quality carpet tape like Carpet Tile Tape by All Flooring Now that is strong, residue free, moisture resistant and has indoor / outdoor use.
- Make sure the subfloor is clean, dry, and free of debris
- Plan the layout of the tiles in advance to ensure a uniform look
- Use a chalk line to mark the center of the room and create a grid pattern
- Apply the carpet tape evenly and in straight lines
- Install the tiles starting in the center of the room and working your way out
- Use a heavy roller or broom to firmly press down on the tiles and activate the adhesive
In conclusion, installing carpet tiles with carpet tape is a cost-effective and easy way to give your space a new look. With careful planning, the right tools, and attention to detail, you can successfully install carpet tiles with carpet tape in your home or business. Whether you are a DIY enthusiast or a professional installer, carpet tiles are a versatile
"GRID" CARPET TILE INSTALLATION METHOD
"CORNER" CARPET TILE INSTALLATION METHOD